
构建一个 iOS 应用并上传到 TestFlight
目标
- 提交一个
commit到Github仓库的main分支后.bashgit push - 观察到
Xcode Cloud自动开始构建应用, 并将构建结果发布到TestFlight上.
前提条件
- 你的
Apple ID已加入苹果开发者计划 - 一个
Github账户
创建一个 Xcode 项目
创建一个新的Bundle ID
每一个苹果应用都有一个ID, 苹果称之为Bundle ID. 这个ID可以在苹果开发者网站中申请, 具体的网址为 Apple Developer > Account > Certificates, IDs & Profiles > Identifiers. 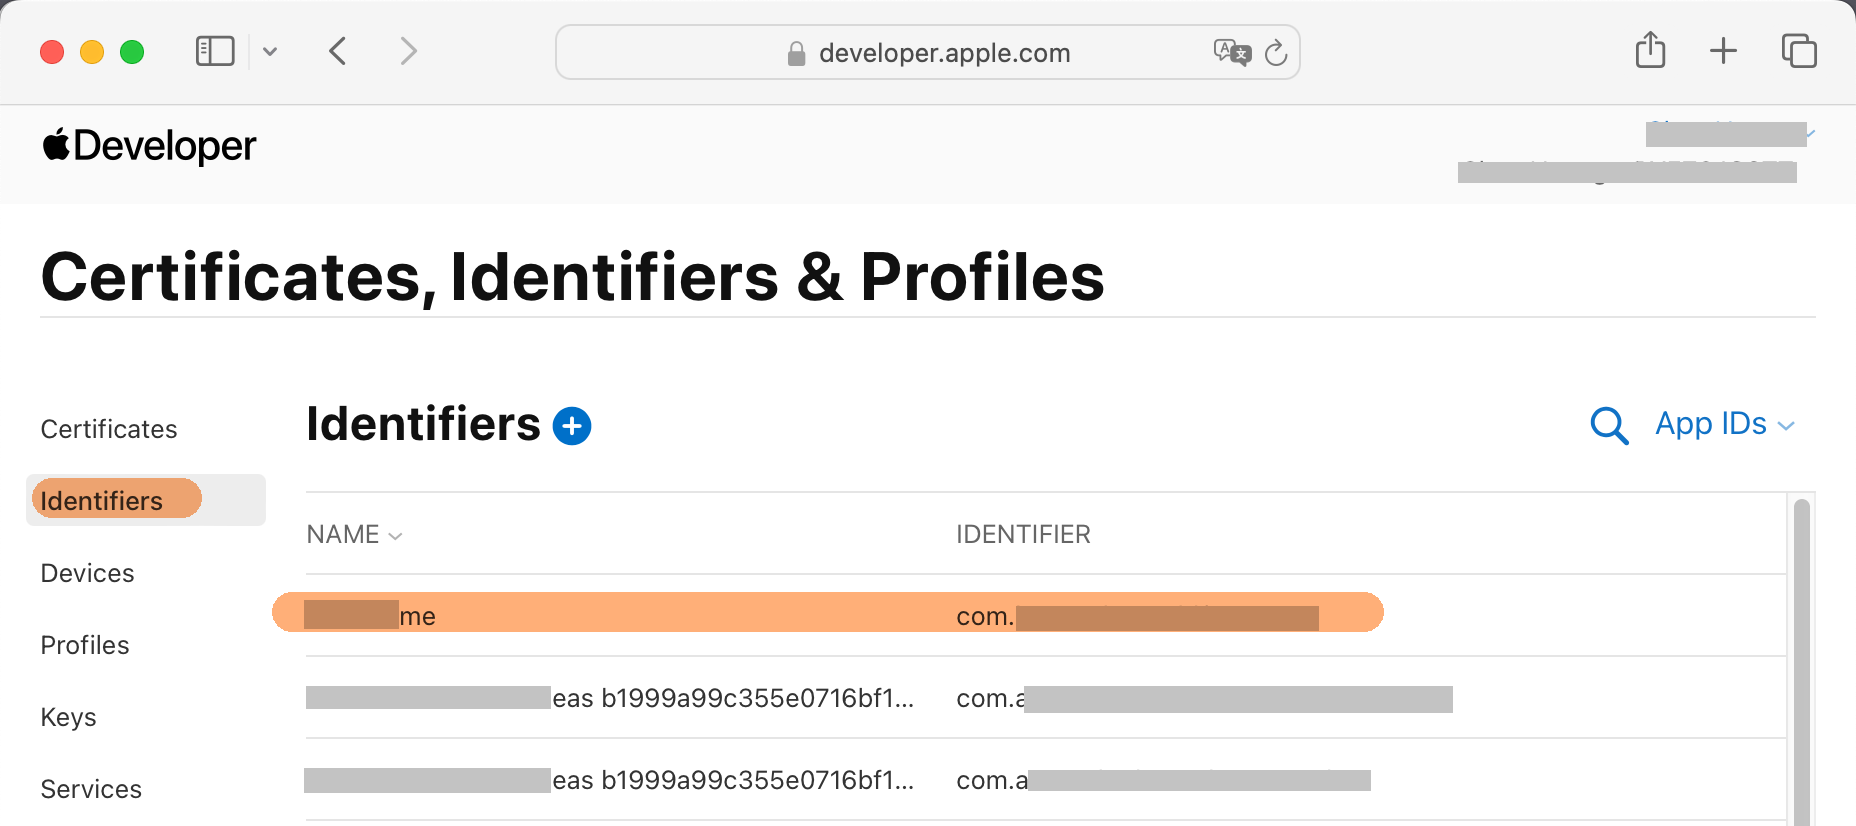
创建一个App Store Connect App
想要在App Store发布应用, 就必须用到 App Store Connect 网站. 之后像是什么更新应用, 添加TestFlight测试者, 查看Xcode Cloud日志, 全部都是在这个网站上操作的.
- 在 Apps 页面点击 New App.
- 填写 New App 表格. 你可能会问 SKU 怎么写, 其实可以随便写, 我一般直接填入
Bundle ID.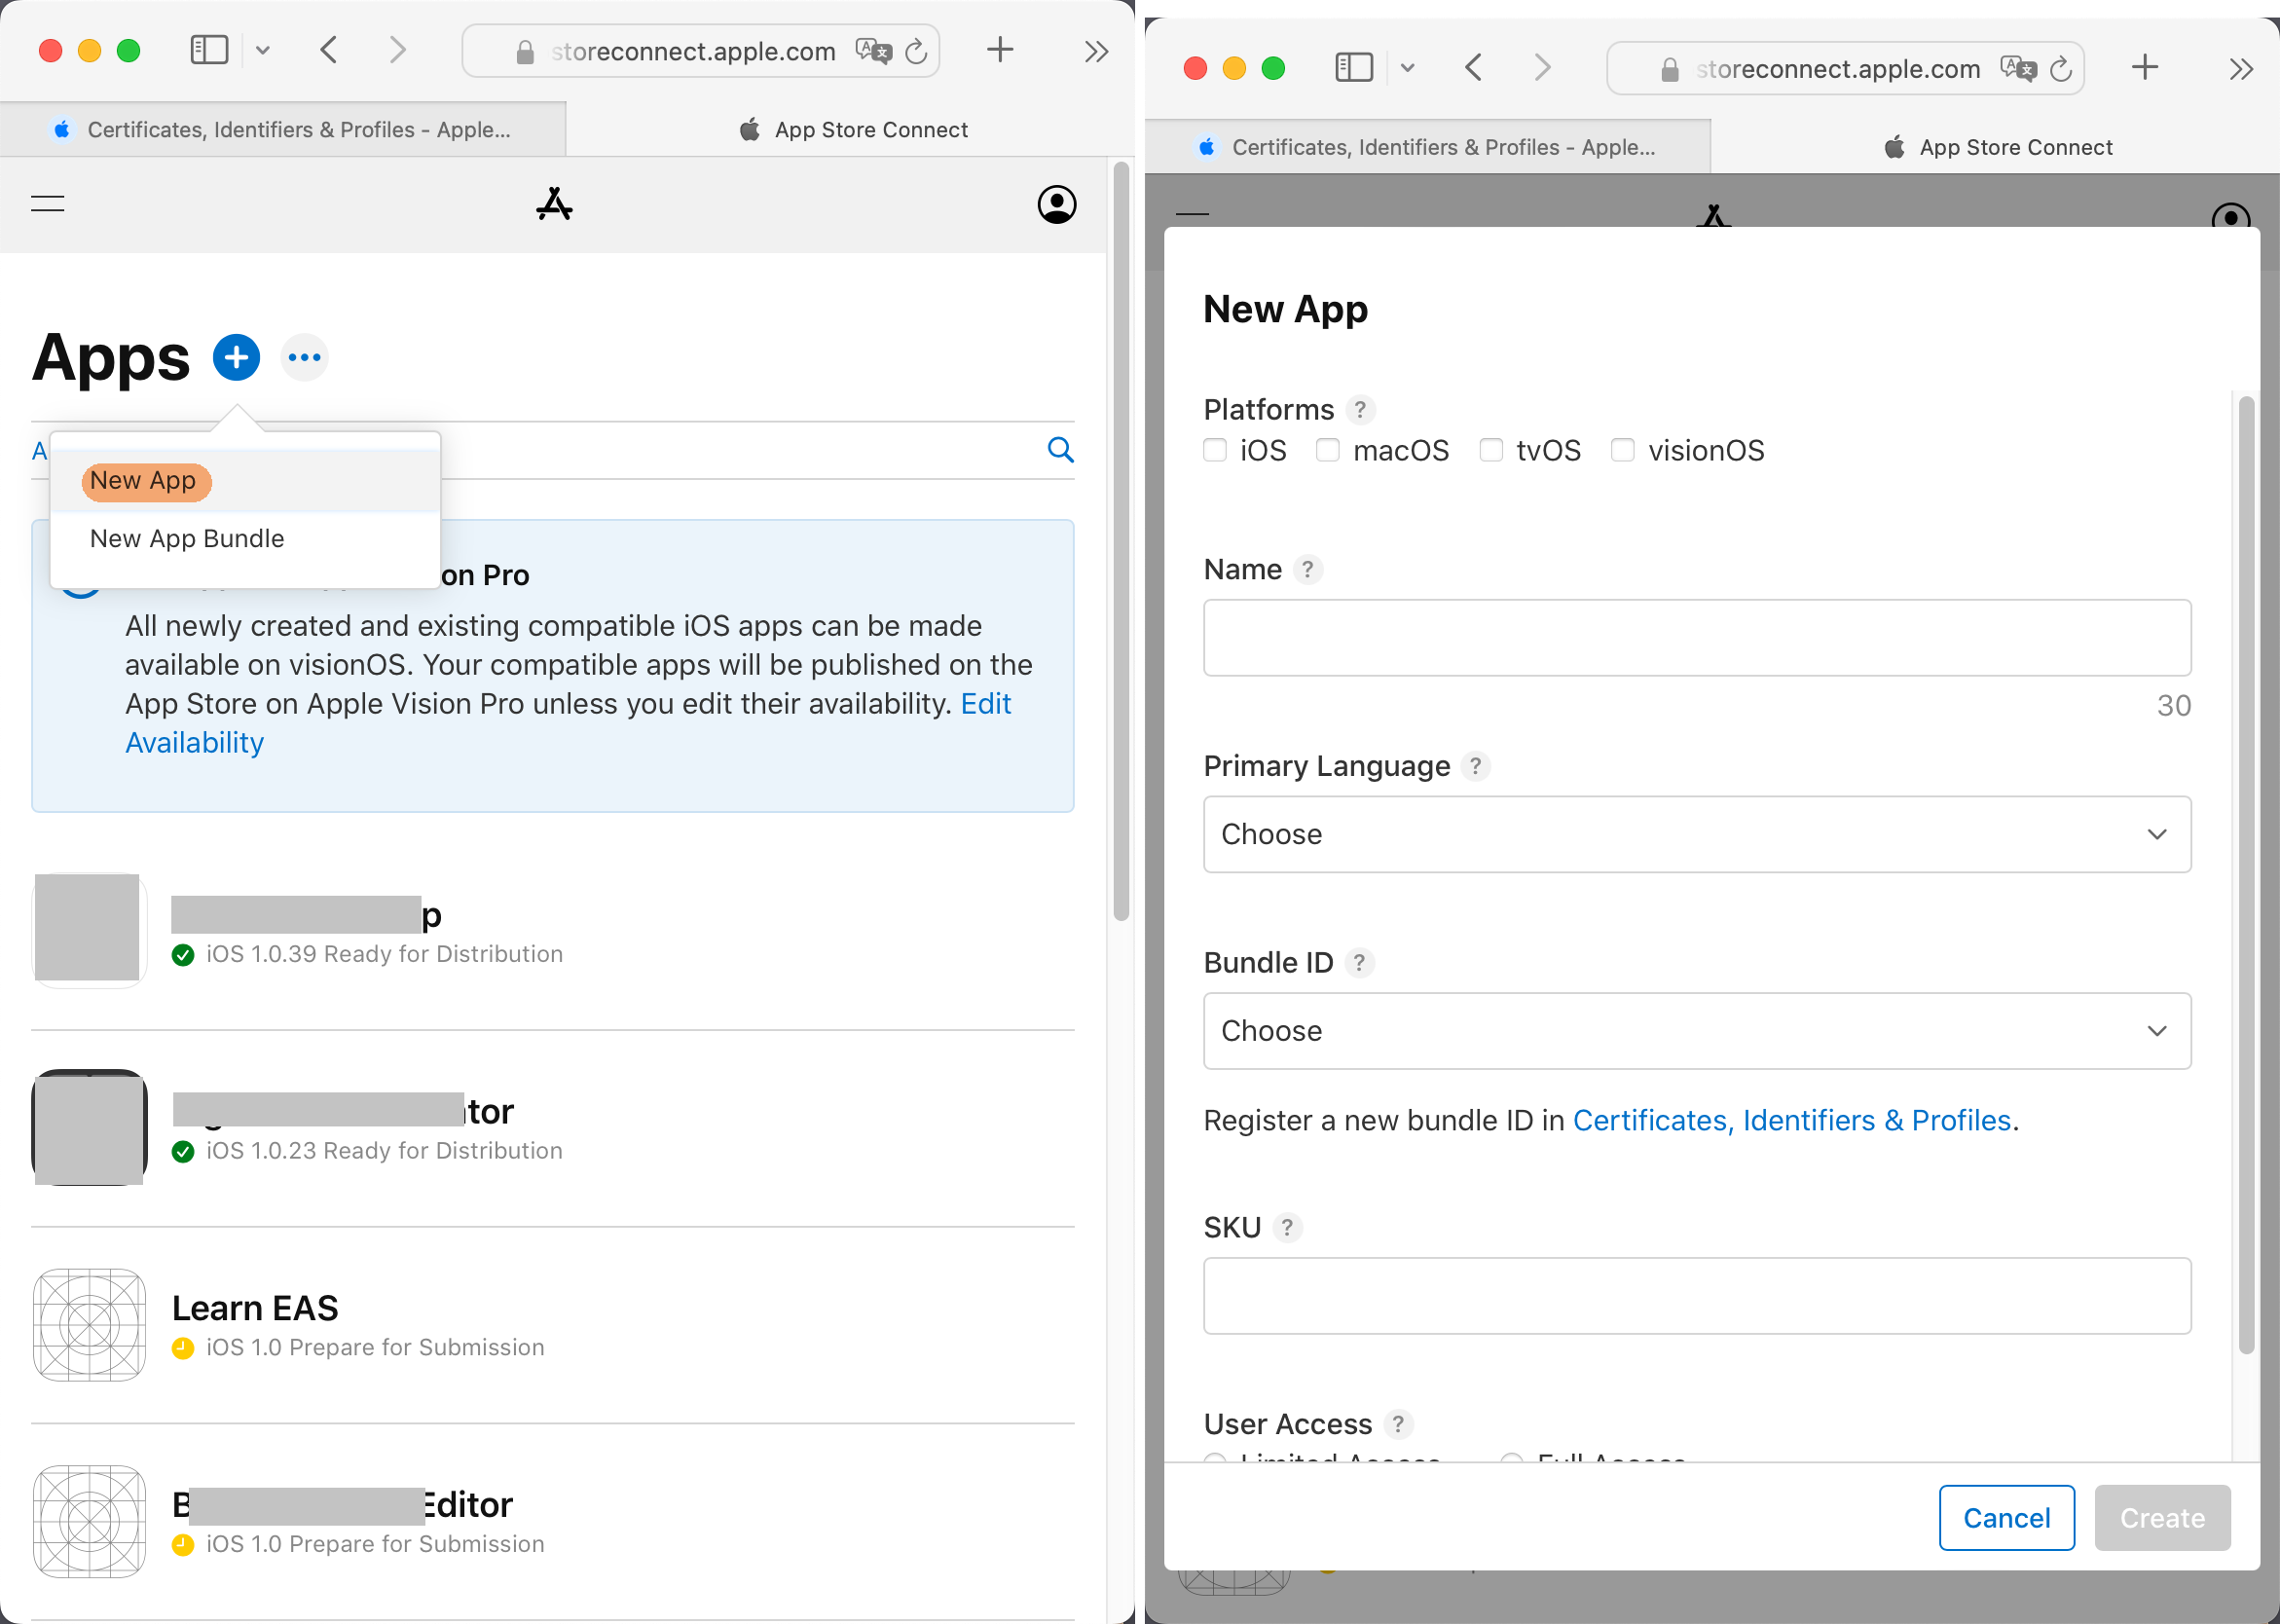
创建Xcode项目
- 打开
Xcode, 创建一个新的项目. - 然后将此项目的
Bundle ID修改为我们新创建的Bundle ID. 修改位置在左侧导航栏>app.xcodeproj>Signing & Capabilities>Signing>Bundle Identifier.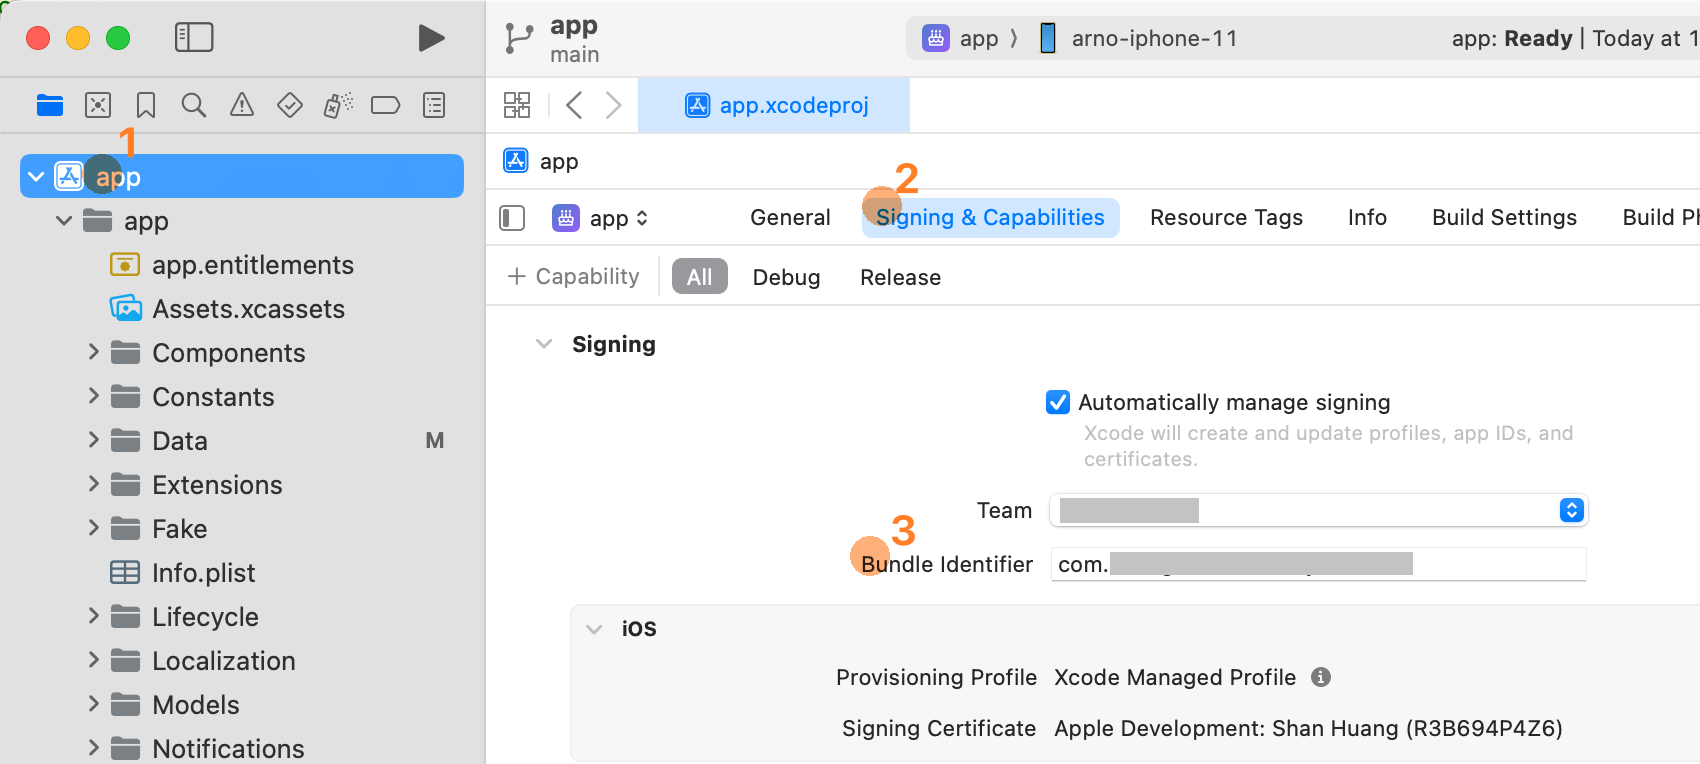
- 修改
Bundle ID后,Xcode会自动获取Profile. 点击Provisioning Profile右边的i图标, 如果全部是打勾, 则说明获取成功.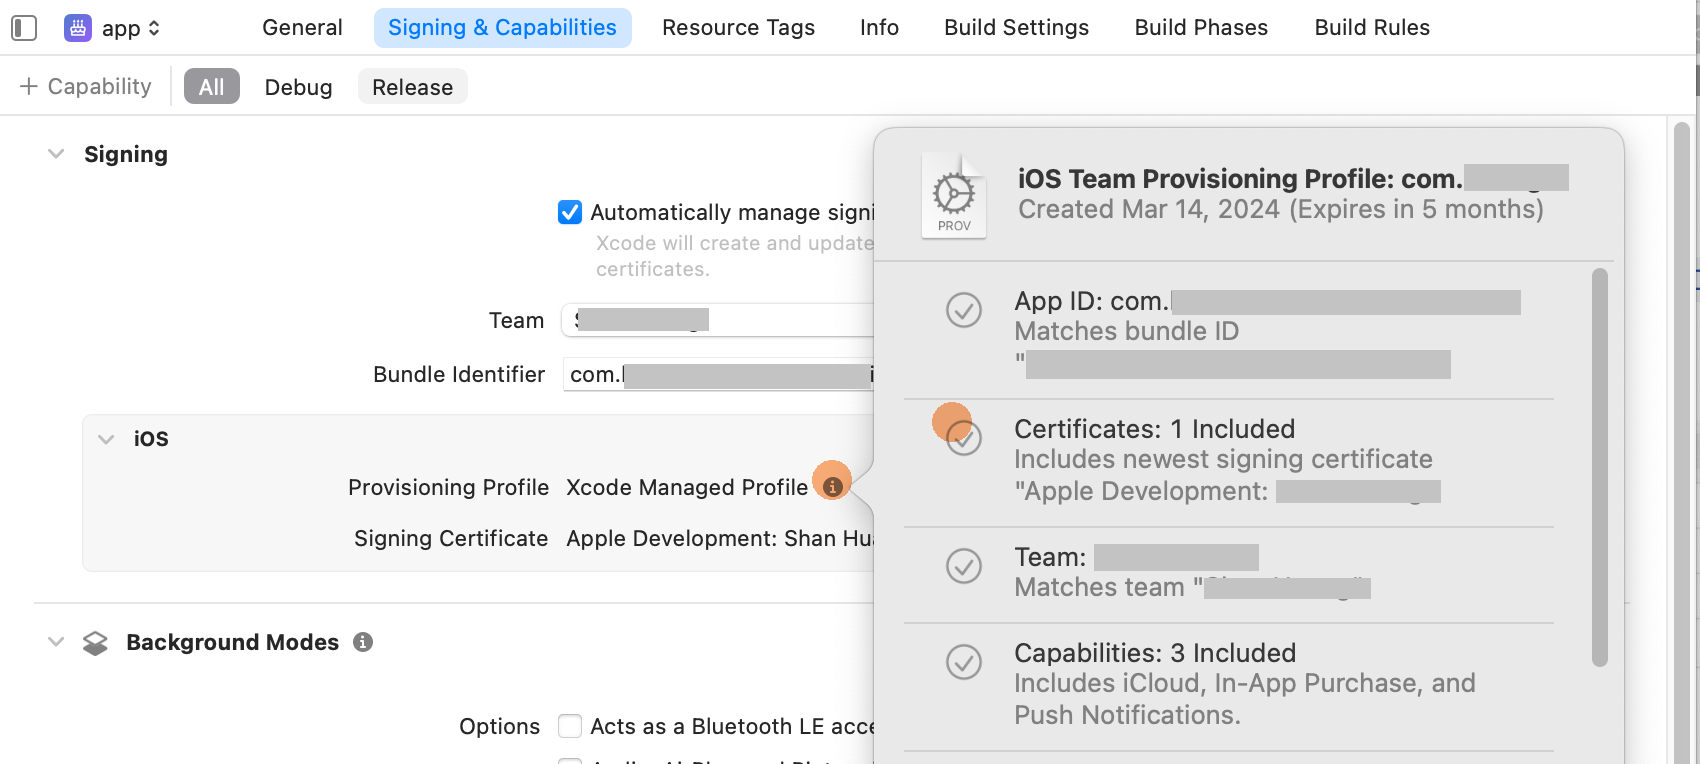
- 在 iOS 模拟器上运行该项目, 保证该项目可以正常运行.
手动构建并上传
注意
在设置 Xcode Cloud 自动构建之前, 请务必先完成一次手动上传. 因为这能保证您在设置 Xcode Cloud 自动构建的时候遇到的问题全部都是 Xcode Cloud 造成的, 而不是由于源码或者 TestFlight 导致的.
首次上传
设置应用图标
- 这一操作是必须的, 因为没有应用图标将会导致手动上传到
TestFlight失败 - 此图片不得有
alpha通道. 因为应用图标如有alpha通道, 将导致Xcode Cloud构建. 您可以通过将应用图标转换为jpeg格式来解决这个问题, 因为jpeg格式的图片没有alpha通道.
设置加密方式
设置 Info.plist 中 ITSAppUsesNonExemptEncryption 键的值.
- 这个键的值反应了当前应用的加密方式, 如果您不知道那是什么, 可以将其设置为
false. - 这一操作是必须的, 因为如果没有在
Info.plist中设置该键值, 每次发布TestFlight前, 您将需要在App Store Connect中手动设置应用的加密方式.
<dict>
   ...
   <key>ITSAppUsesNonExemptEncryption</key>
   <false/>
</dict>
构建, 上传
- 设置
Run Destination为Any iOS Device - 点击
顶部菜单栏>Product>Archive以开始构建 - 在构建完成后一个名为
Archives的窗口会自动弹出(该窗口亦可通过顶部菜单栏>Window>Organizer打开). 选择刚刚生成的Archive, 然后点击Distribute App. 如此, 应用便开始上传到TestFlight.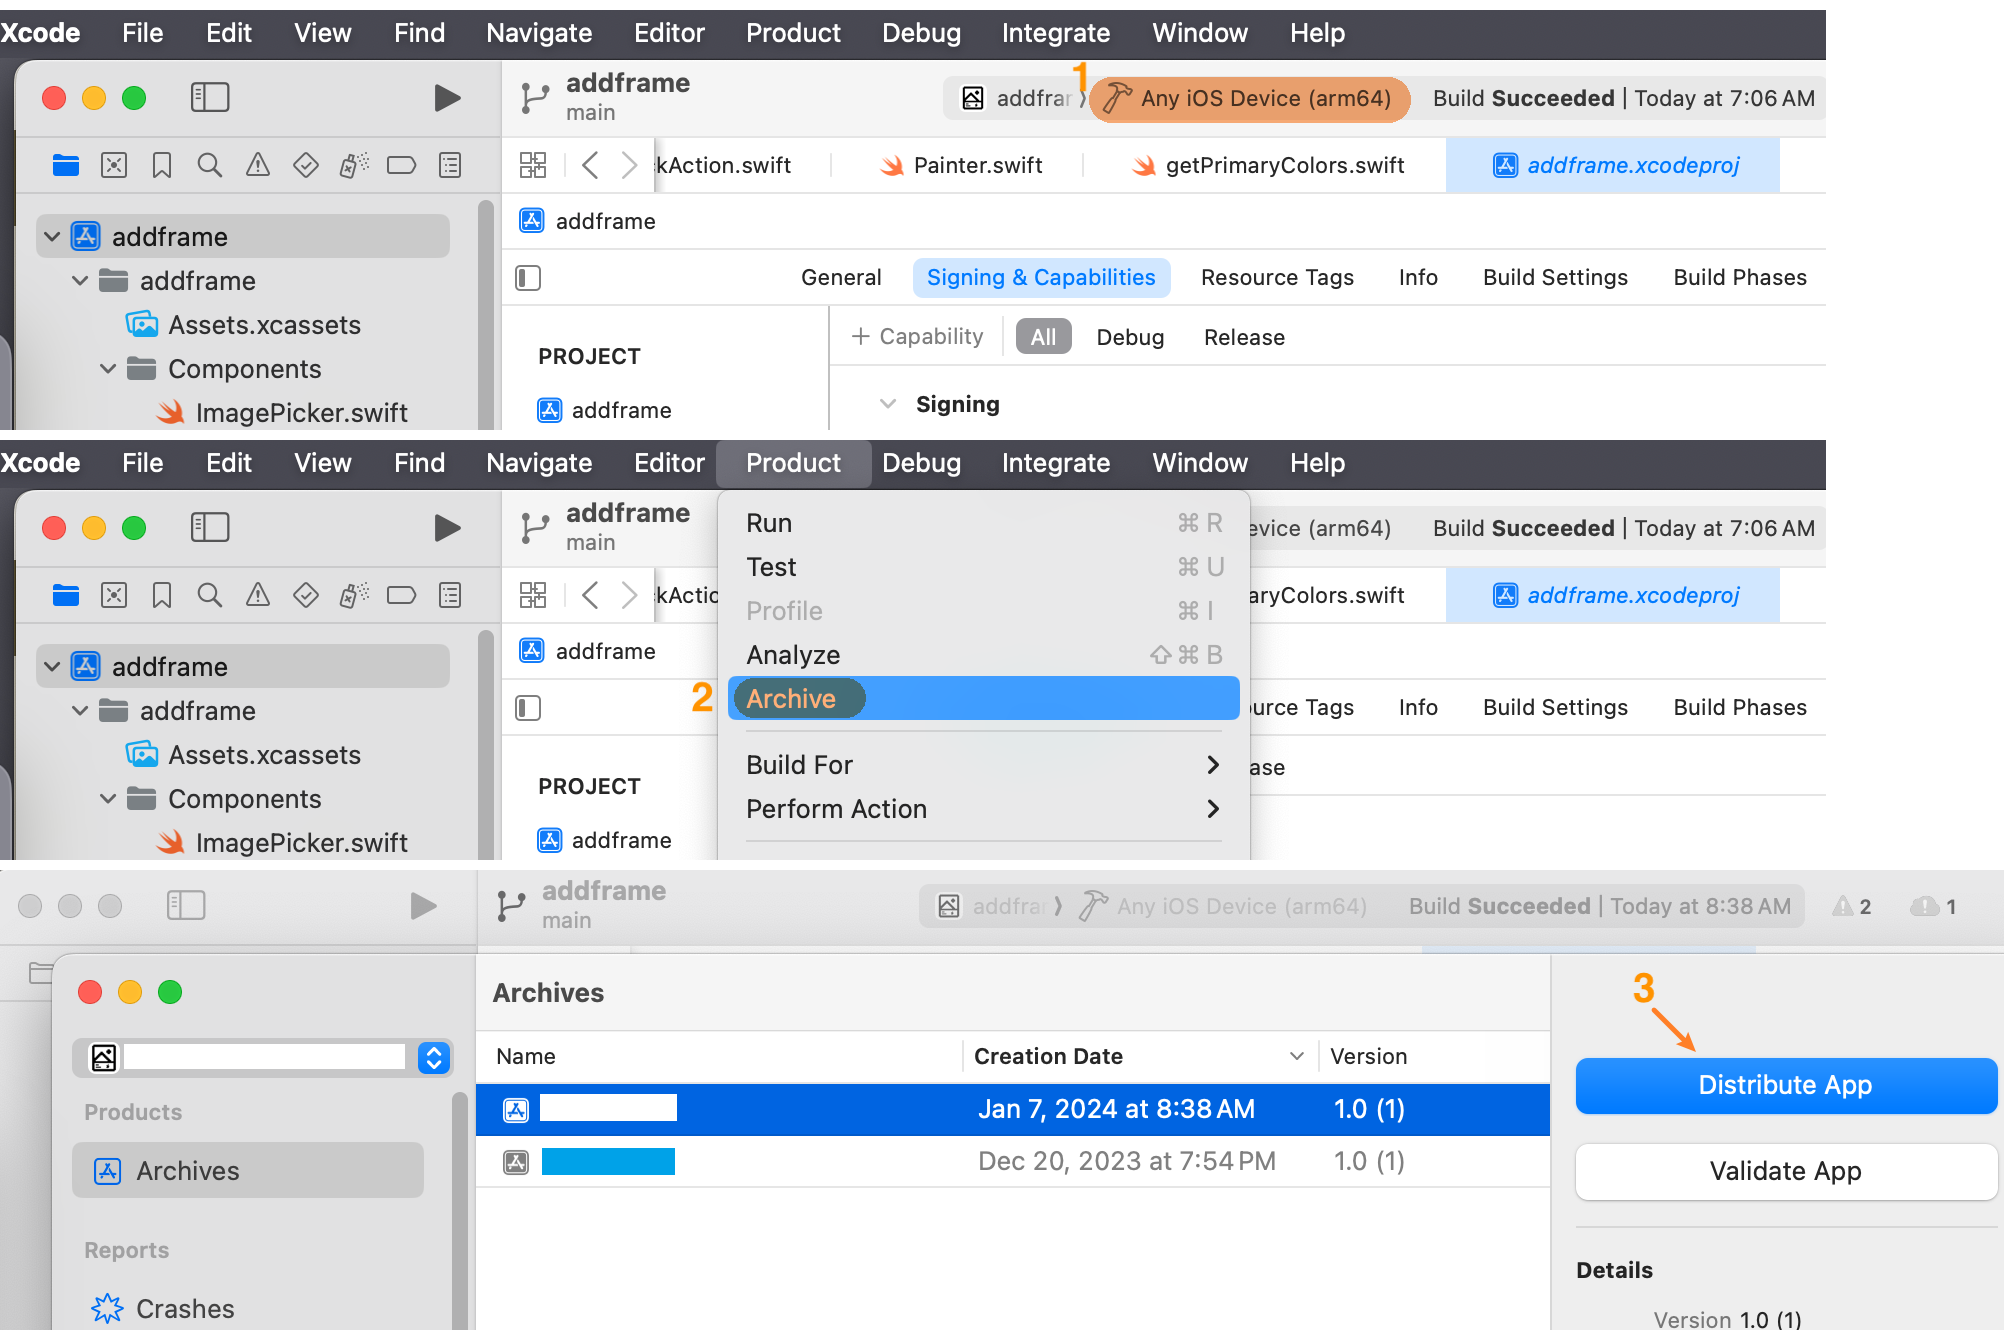
创建 TestFlight 测试组
- 当
Archive上传完成后, 你就能在 App Store Connect > TestFlight 网页中找到你刚刚上传的项目了. - 在
TestFlight中创建一个内部测试组(INTERNAL TESTING). - 将测试者的
Apple ID加到组里. 这一操作会使得TestFlight向你的Apple ID对应的邮箱发送一封邀请邮件.- 注意, 如果测试者不是当前开发者帐号的成员, 需要先要求他的
Apple ID成为开发者帐号的成员.
- 注意, 如果测试者不是当前开发者帐号的成员, 需要先要求他的
接受 TestFlight 邀请
- 测试者首先需要保证自己的设备已安装
TestFlight 应用. 如尚未安装, 请到 App Store 安装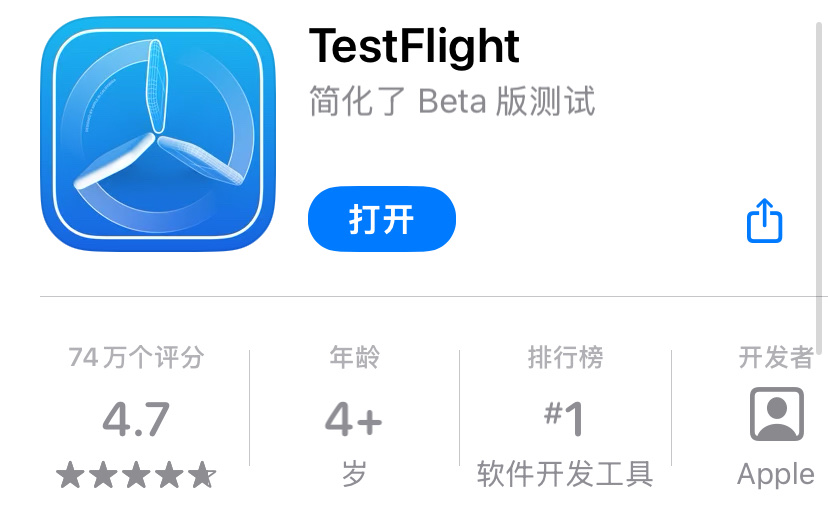
- 测试者检查其
Apple ID对应的邮箱, 找到来自TestFlight的邀请邮件. - 点击邮件中的
View in TestFlight按钮, 这将打开TestFlight 应用,TestFlight 应用会询问你是否接受邀请, 点击Accept. 如此测试者将能够在TestFlight 应用中找到测试应用, 测试应用更新时测试者的设备将会收到通知.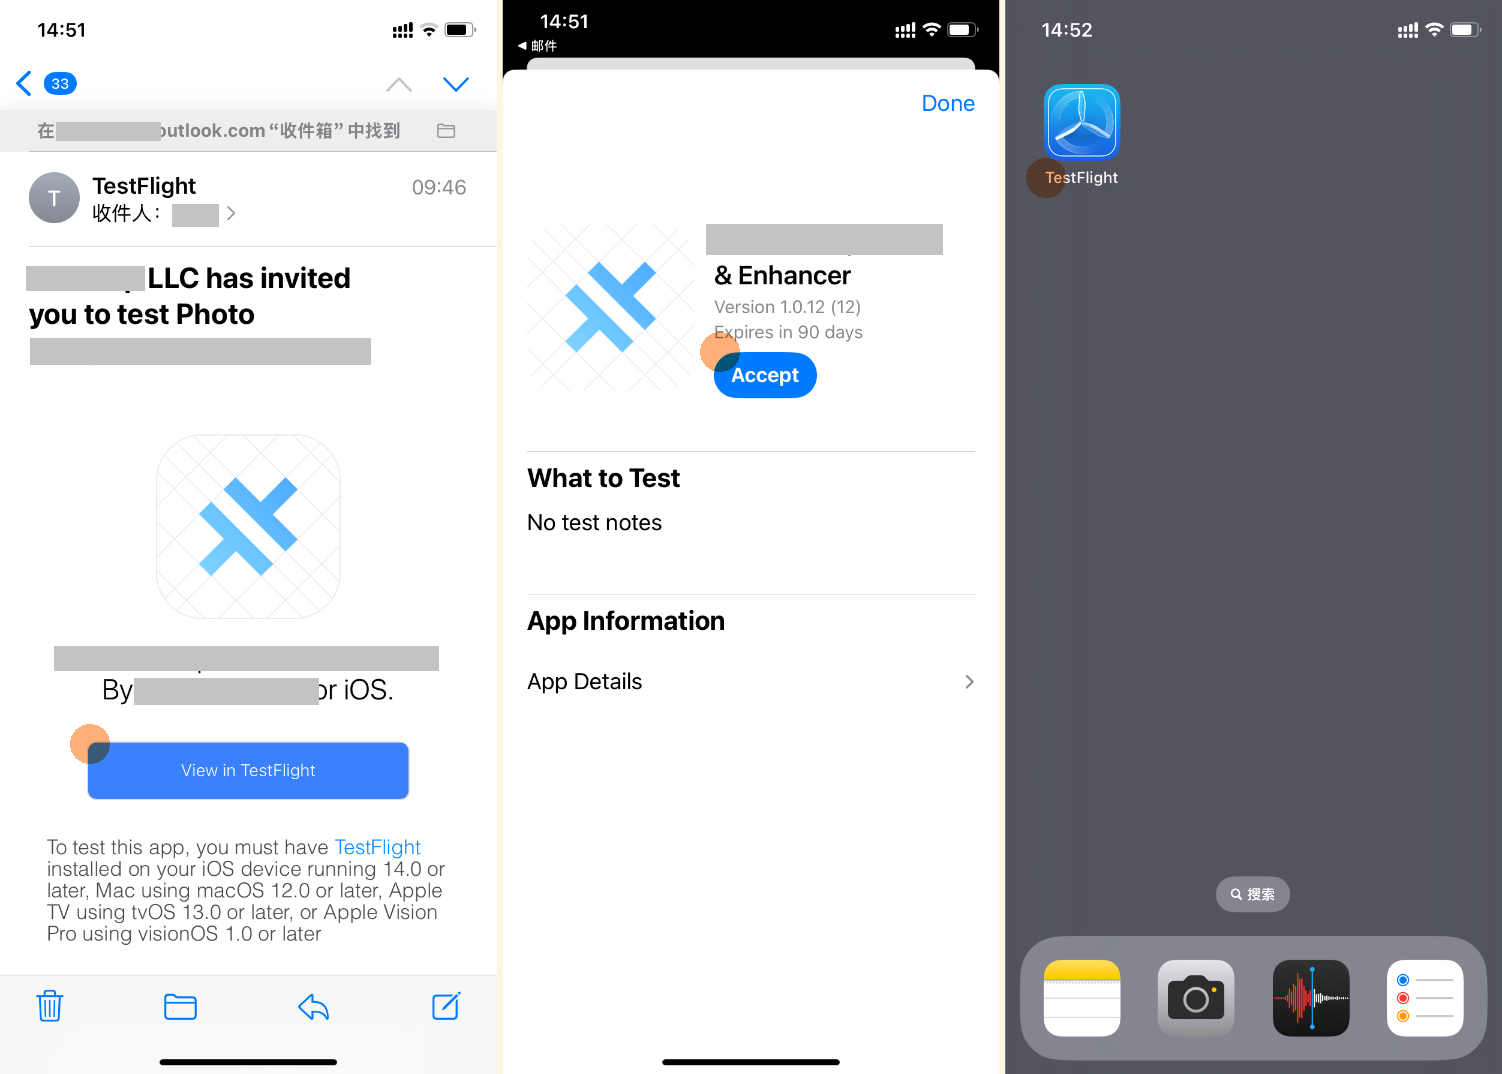
再次上传
加大版本号
如果你想上传一个船新版本新的版本到TestFlight, 那么你必须先到 左侧导航栏 > app.xcodeproj > General > Identity 加大应用的版本号. 因为 TestFlight 只接受比当前版本大的 Archive. 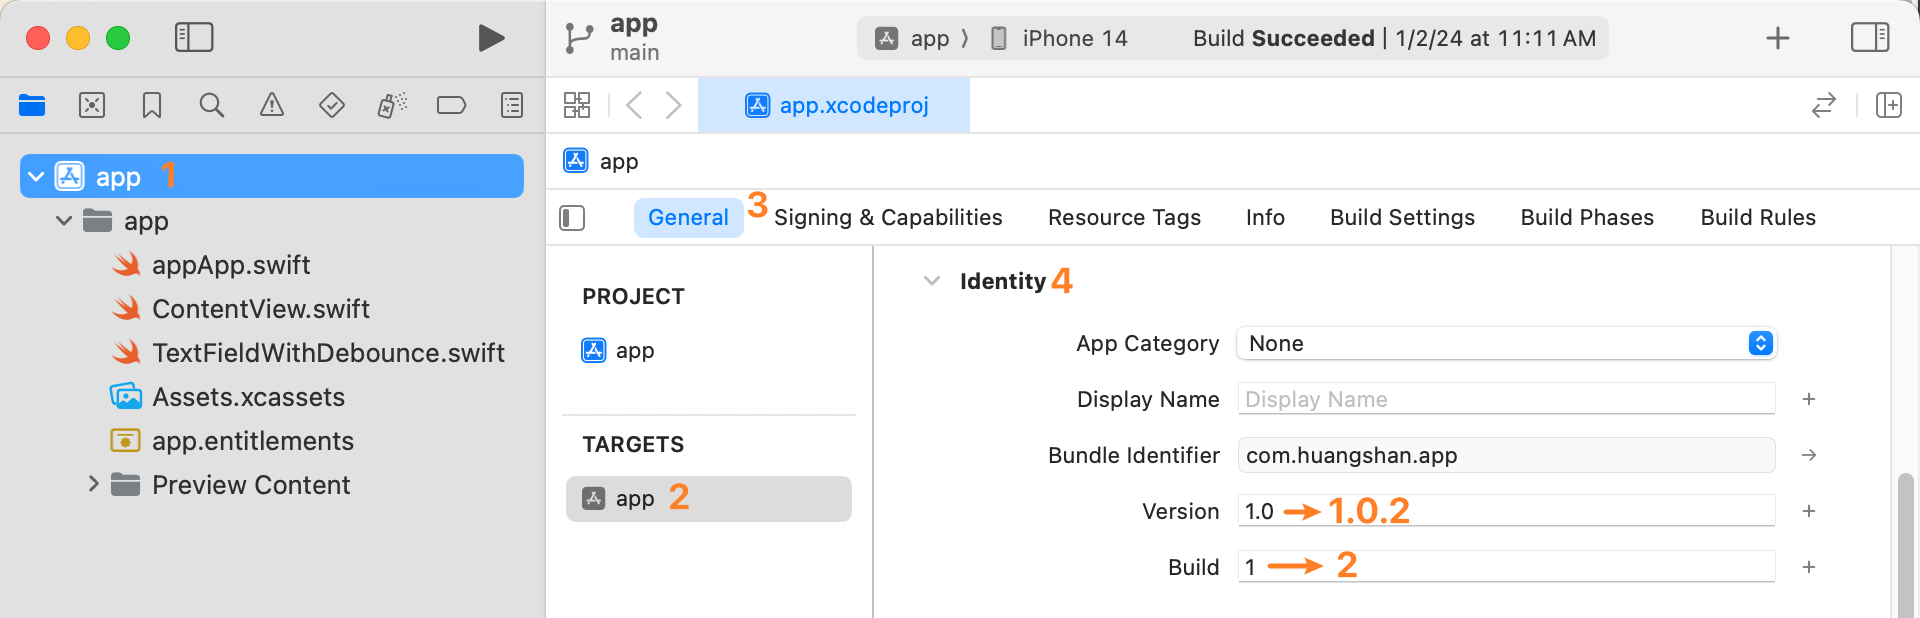
Xcode Cloud 自动构建并上传
在设置完 Xcode Cloud workflow 后, 每次 Github仓库 的 main 分支变化时, Xcode Cloud 就会自动开始构建 Archive, 完成后自动将其上传到 TestFlight.
创建 Github 仓库
创建一个main分支, 然后将这个分支上传Github仓库.
创建 Xcode Cloud workflow
- 创建
workflow的按钮在Xcode>左侧导航栏>最右边那个标签>Cloud>Get Started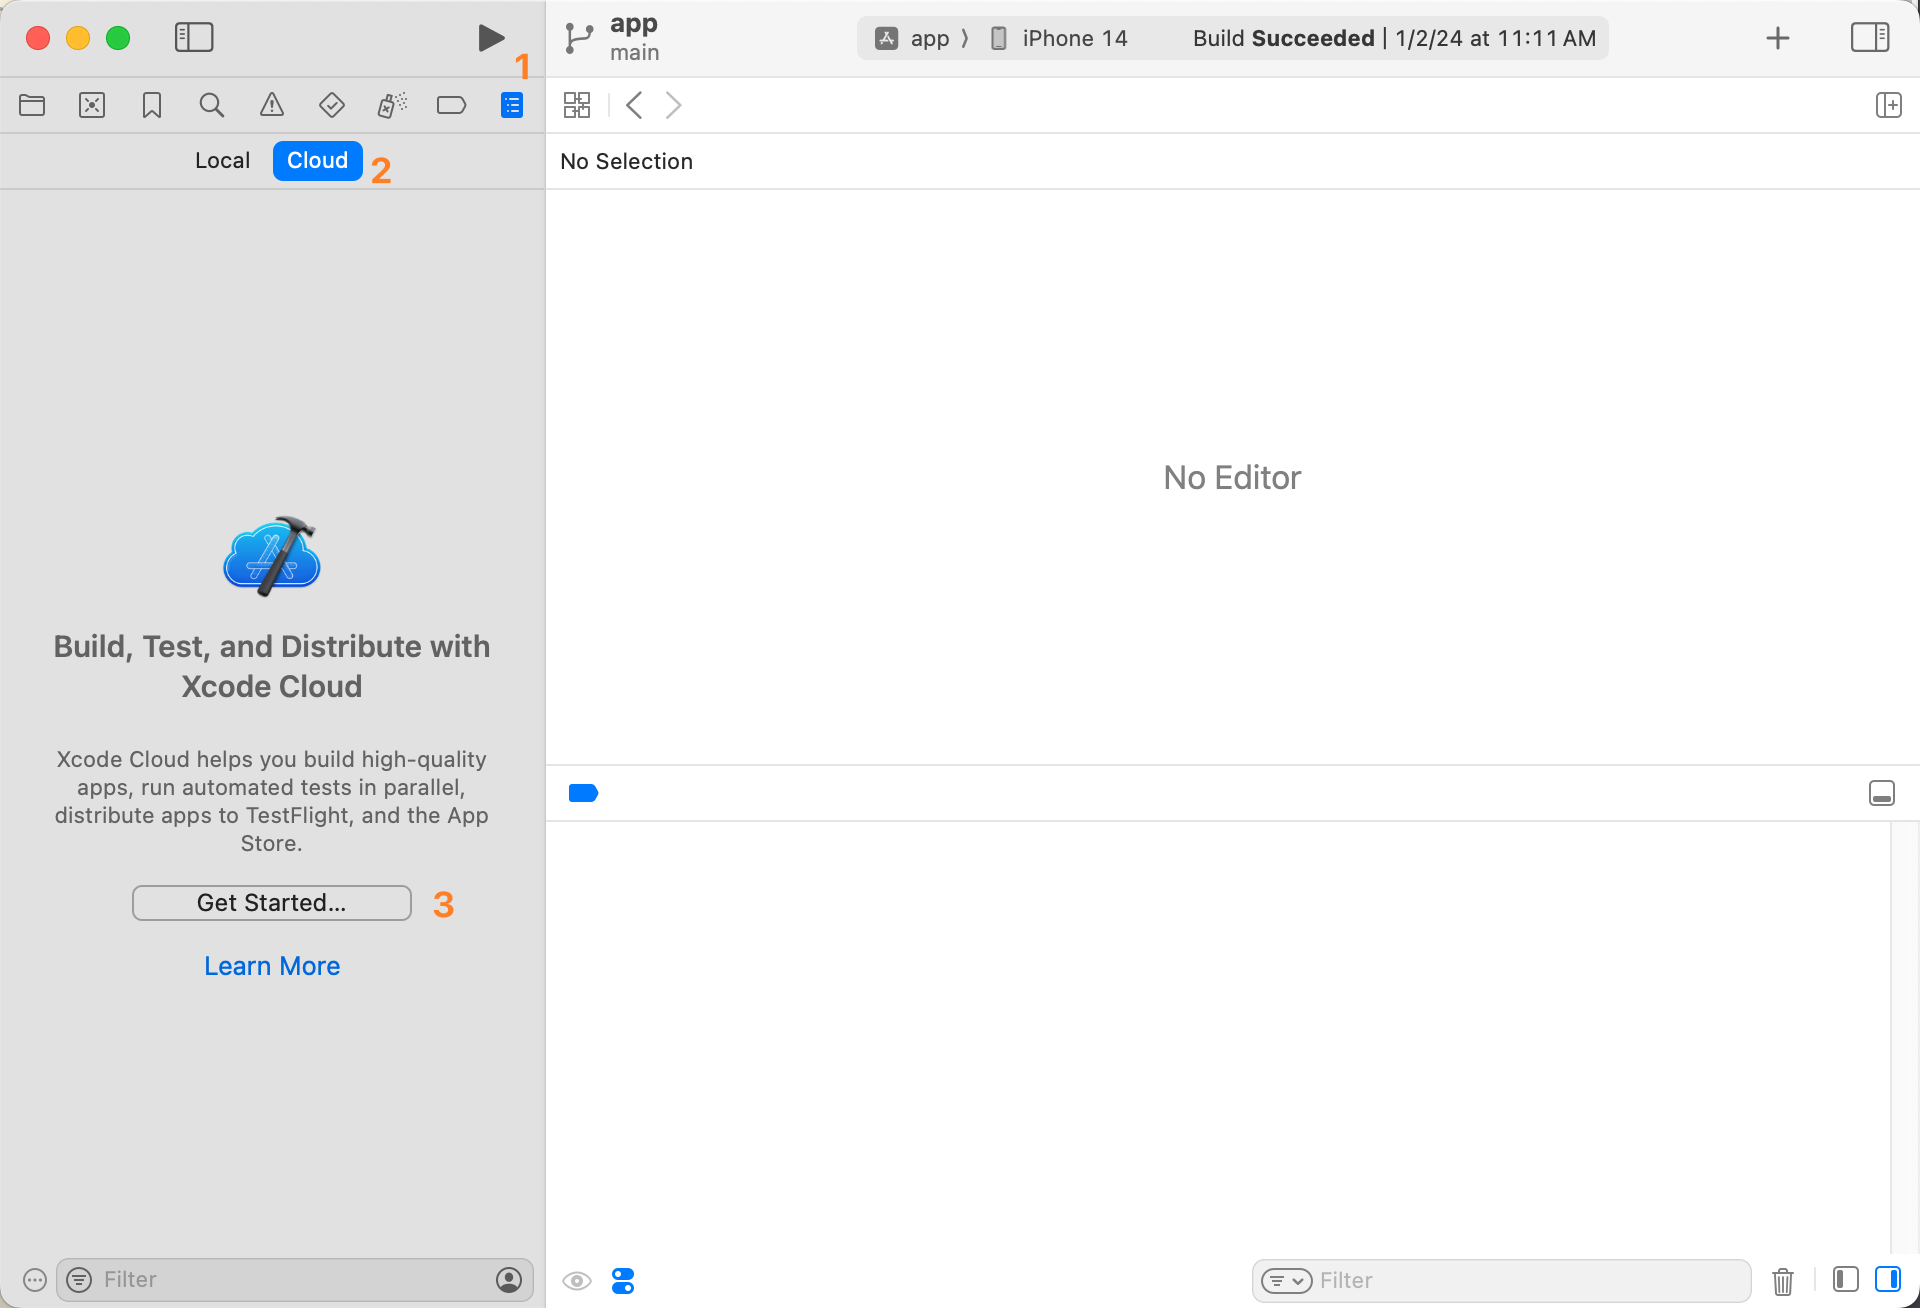
- 创建过程中需要为
workflow增加一个Archive类型的Action. 其中Distribution Preparation需要选为App Store Connect, 因为这个构建最终可能会被发布到App Store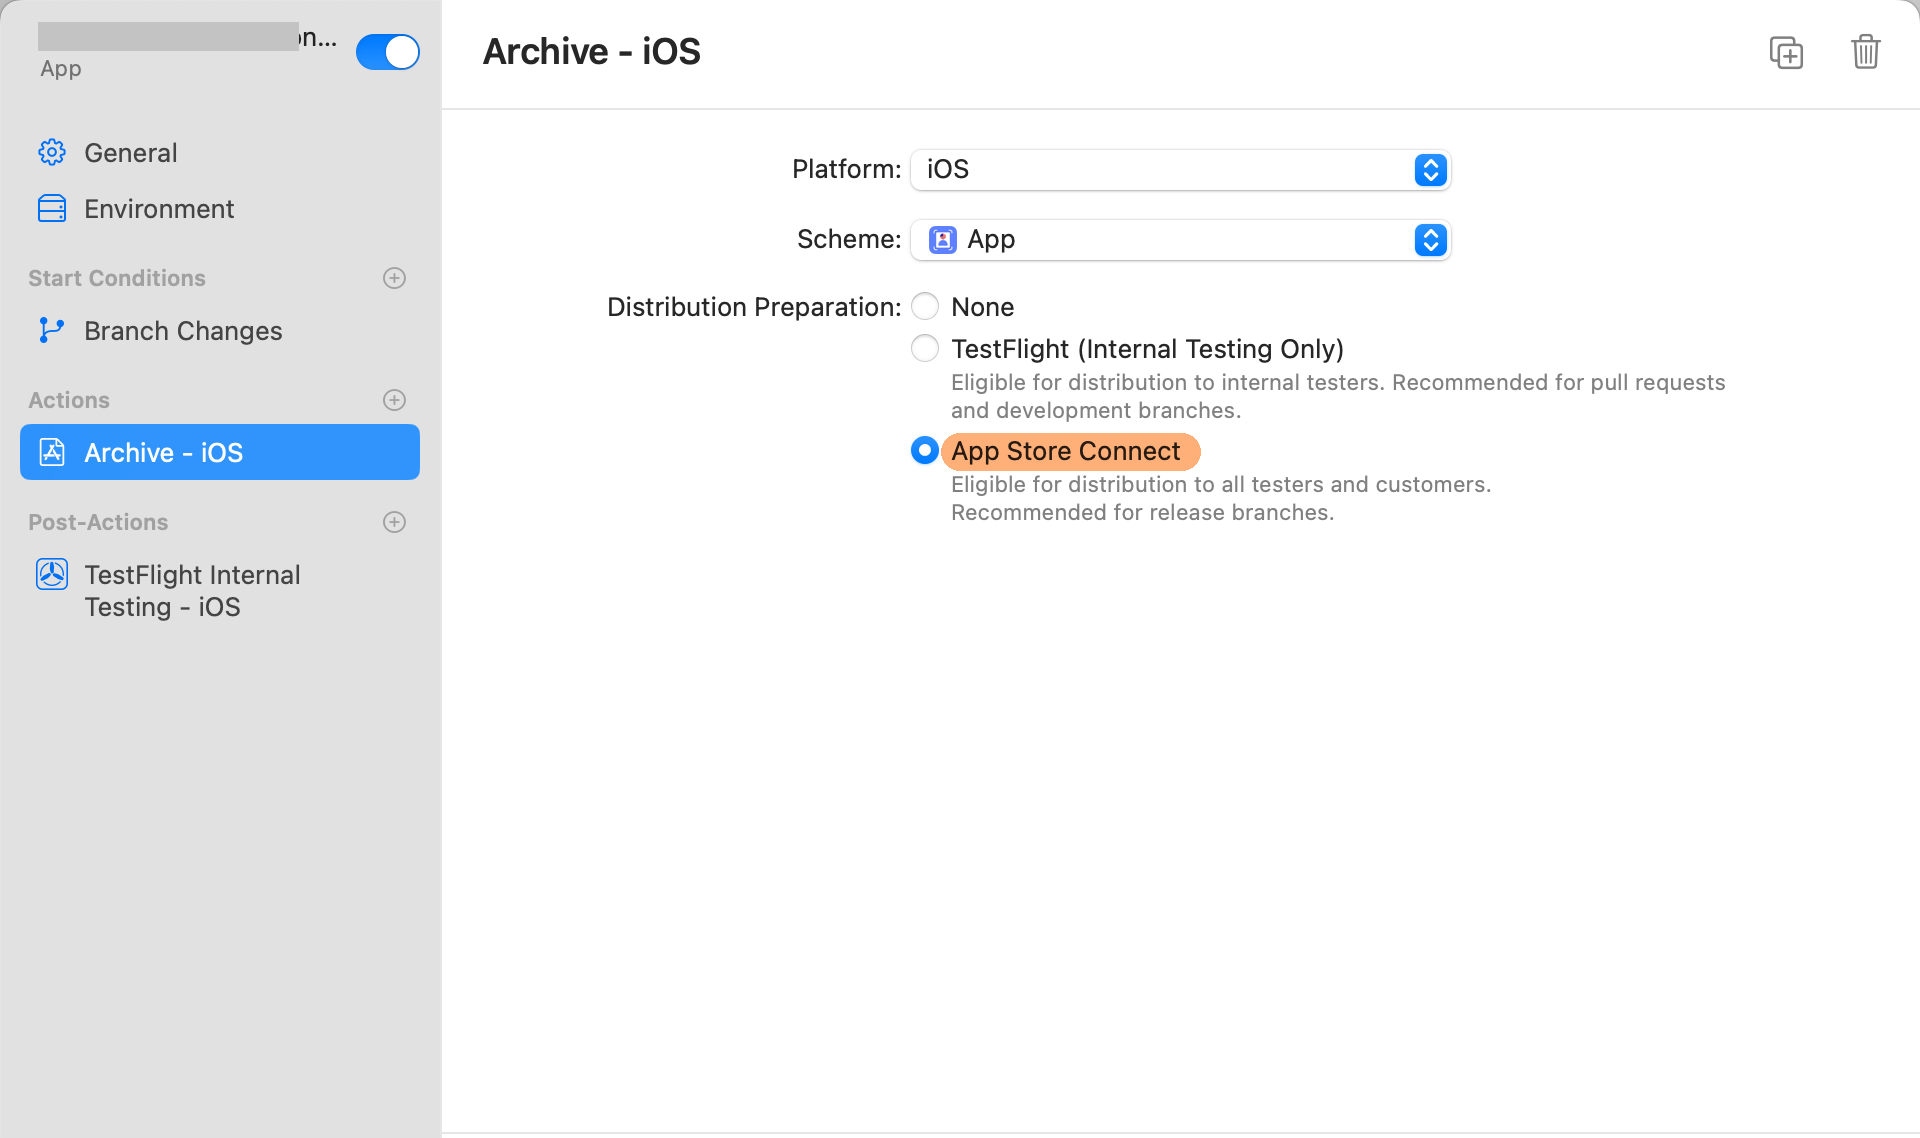
- 此时如果我们向
Github仓库的main分支提交一个commit, 应该就会触发Xcode Cloud的自动构建了. 你可以在 App Store Connect > Xcode Cloud 观察构建过程.
构建完成后自动发布到 TestFlight
上述 workflow 配置了自动构建, 但是没有配置自动发布. 我们现在跳转到 App Store Connect > Xcode Cloud.
打开要编辑的 workflow, 然后增加一个 Post-Action, 类型为 TestFlight Internal Testing. 选择你之前创建的测试组, 然后每次 Xcode Cloud 构建完成后就会自动发布到 TestFlight 了. 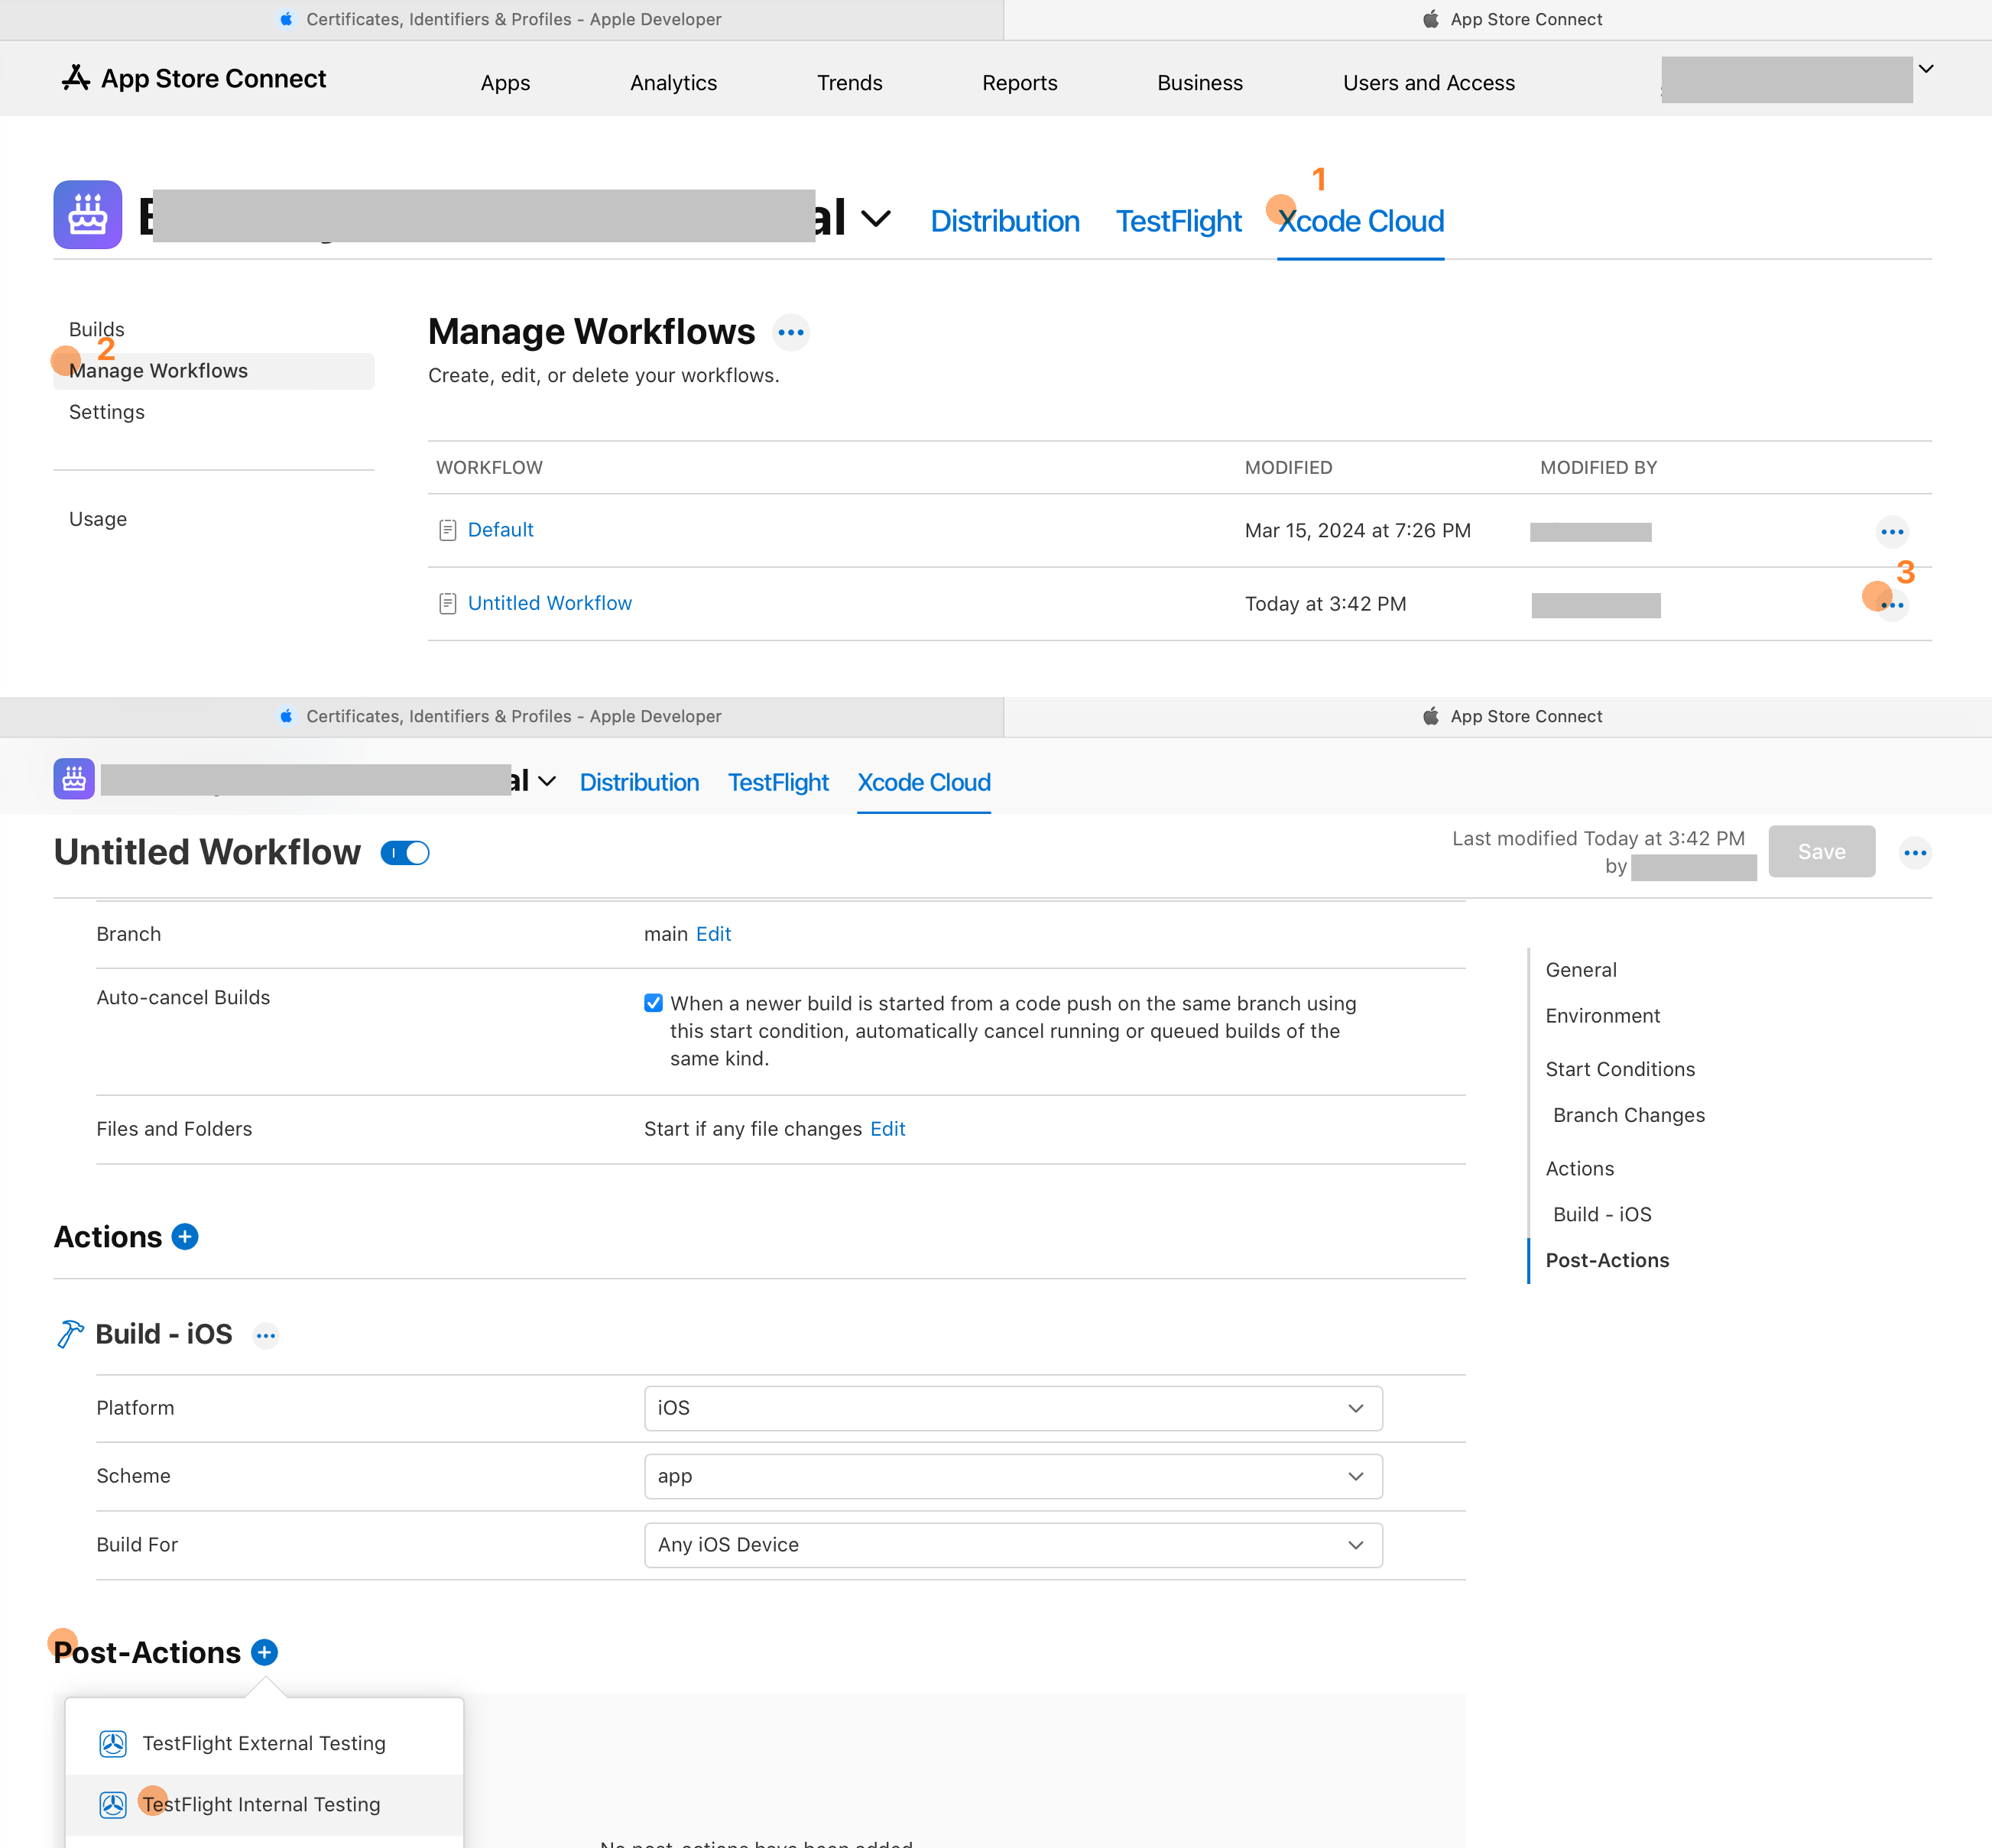
自动加大版本号
根据苹果的文档 Writing custom build scripts | Apple, Xcode Cloud 在构建 Archive 之前, 会运行项目文件夹下的 ci_scripts/ci_post_clone.sh 文件. 所以我们可以在该文件中运行一个js脚本来加大版本号.
#!/bin/sh

# Note: Xcode will run ci_post_clone.sh at ci_scripts directory

export HOMEBREW_NO_INSTALL_CLEANUP=TRUE

# Install node start
brew install node
brew link node
# Install node end

# Change App info
node changeAppInfo.mjs#!/usr/bin/env node
import fs from "node:fs/promises";
import path from "node:path";
import process from "node:process";
async function main() {
try {
// TODO: Replace config path. Note: Xcode will run ci_post_clone.sh at ci_scripts directory
const configPath = path.resolve('../app.xcodeproj/project.pbxproj')
await increaseVersion(configPath)
}
catch (error) {
console.error(error)
process.exit(1)
}
}
/**
* Increase version automatically in project.pbxproj file
* Build #26 1.2 -> 1.2.26
* Build #27 1.2 -> 1.2.27
*/
async function increaseVersion(configPath) {
const configText = await fs.readFile(configPath, { encoding: 'utf-8' })
print(`Changing ${configPath}`)
const regex = /MARKETING_VERSION = (.+?);/g
const versionMatch = configText.match(regex)
if (versionMatch === null) {
throw new Error(`Cant get iOS bundle version in ${configPath}, terminate build`)
}
const bundleVersion = versionMatch[0].replace('MARKETING_VERSION = ', '').replace(';', '')
const finalBundleVersion = `${bundleVersion}.${process.env.CI_BUILD_NUMBER}`
print(`Overwrite version: ${bundleVersion} -> ${finalBundleVersion}`)
const updatedConfigText = configText
.replace(regex, `MARKETING_VERSION = ${finalBundleVersion};`)
await fs.writeFile(configPath, updatedConfigText, { encoding: 'utf-8' })
}
function print(message) {
console.log(`[changeAppInfo] ${message}`)
}
main()应用图标
使用Xcode Cloud构建时, 应用图标不得有alpha通道, 其实就是不能有透明的像素. 你可以通过将应用图标转换为jpeg格式来解决这个问题, 因为jpeg格式的图片没有alpha通道.