
Build an iOS App then publish to TestFlight
This article shows how to build and publish an iOS App to TestFlight manually or automatically with Xcode Cloud.
Prerequisites
- An Apple ID that has joined Apple Developer Program
- A Github account
Create a Xcode project
- Create a
Bundle IDat Apple Developer website - Create an
AppApp Store ConnectNote: The term "App" here means a project we create at App Store Connect rather an App on your phone.
- Use the newly created
Bundle IDto create aXcodeproject. - Make sure signing of the
Xcodeproject is valid. - Run the App, make sure it works.
- Git init, then push this repo to
Github.
Manually build
Basic workflow
- Set
Run DestinationasAny iOS Device - Click
Product>Archiveto start building - After building completed, a small window with a title
Archiveswill be opened. ClickDistribute App, then waiting upload complete. - After upload complete, you should be able to find this build at App Store Connect >
TestFlight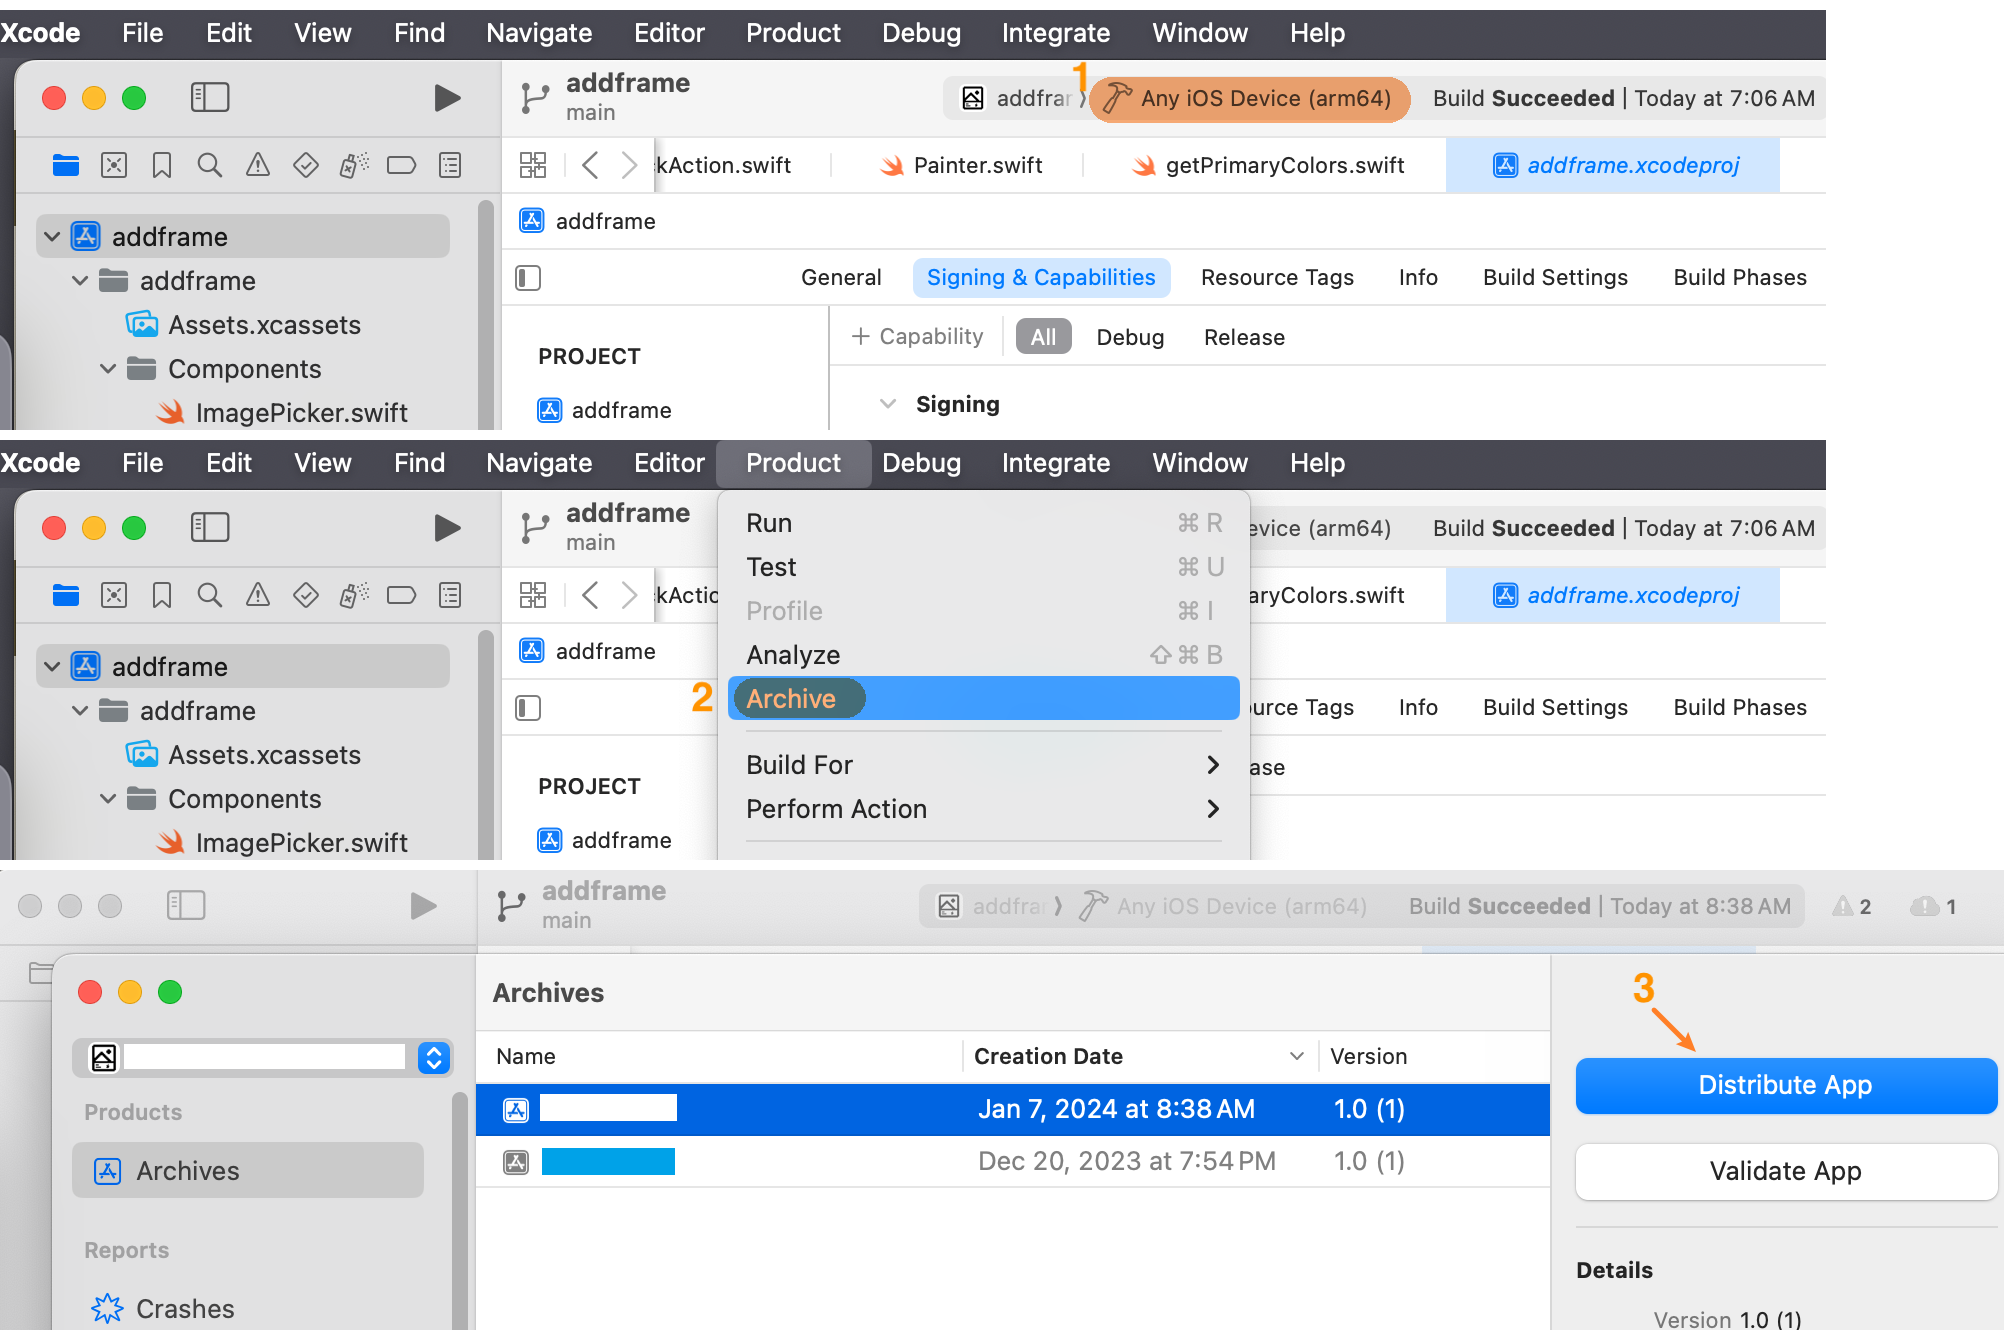
Increase version
If you want upload your build to TestFlight again, then you must update version at app.xcodeproj > General > Identity first. 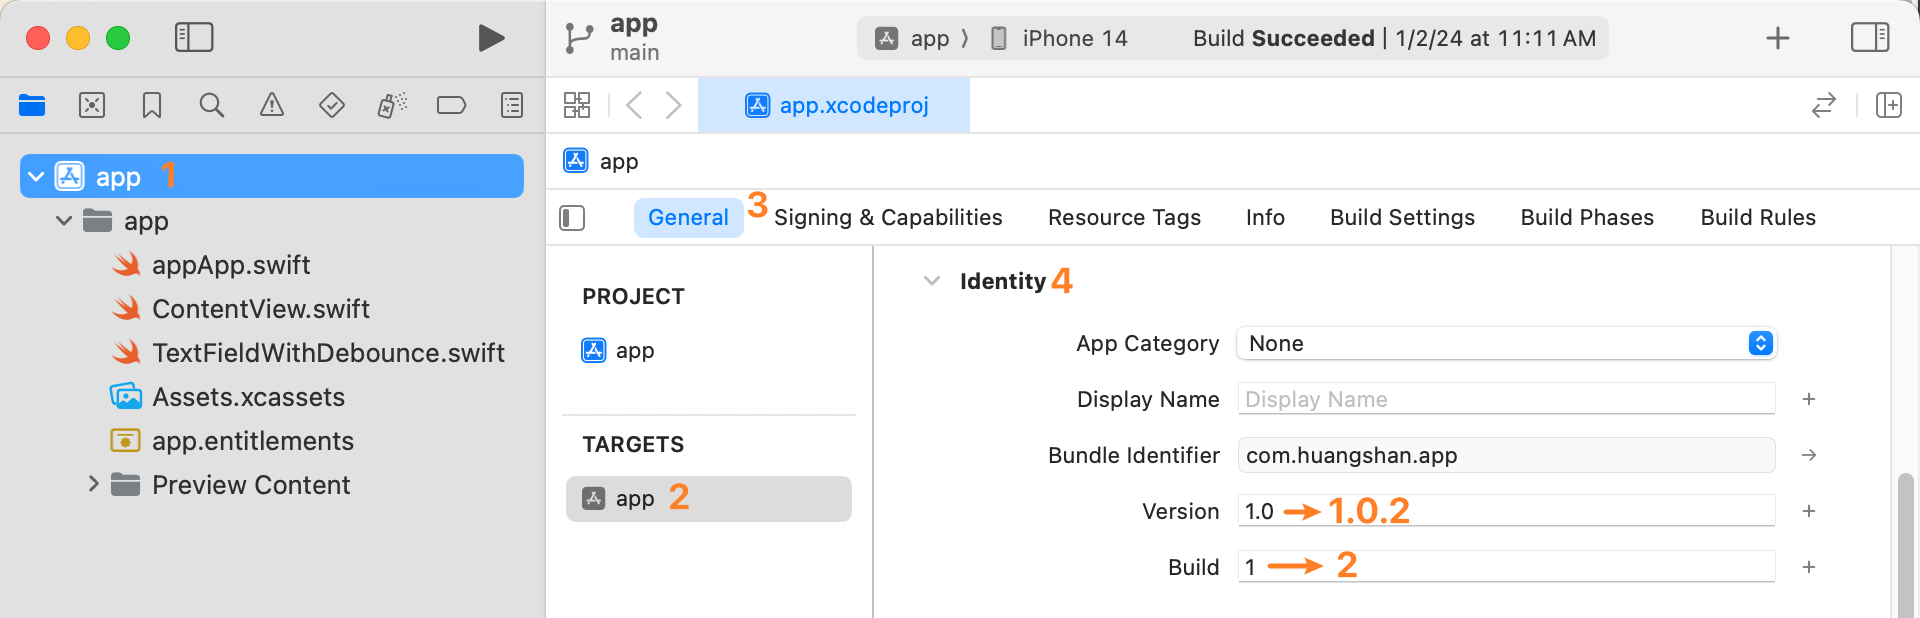
Automatically build
After setting up Xcode Cloud workflow, your App will automatically build and publish to TestFlight by Xcode Cloud after you push a commit to Github.
Note: Until now (2024-01-07) you can only create your first Xcode Cloud Workflow with Xcode rather than App Store Connect >
Xcode Cloud
Basic workflow
You can find the setup workflow button as following picture showed. You can also find more detailed guide at Configuring your first Xcode Cloud workflow | Apple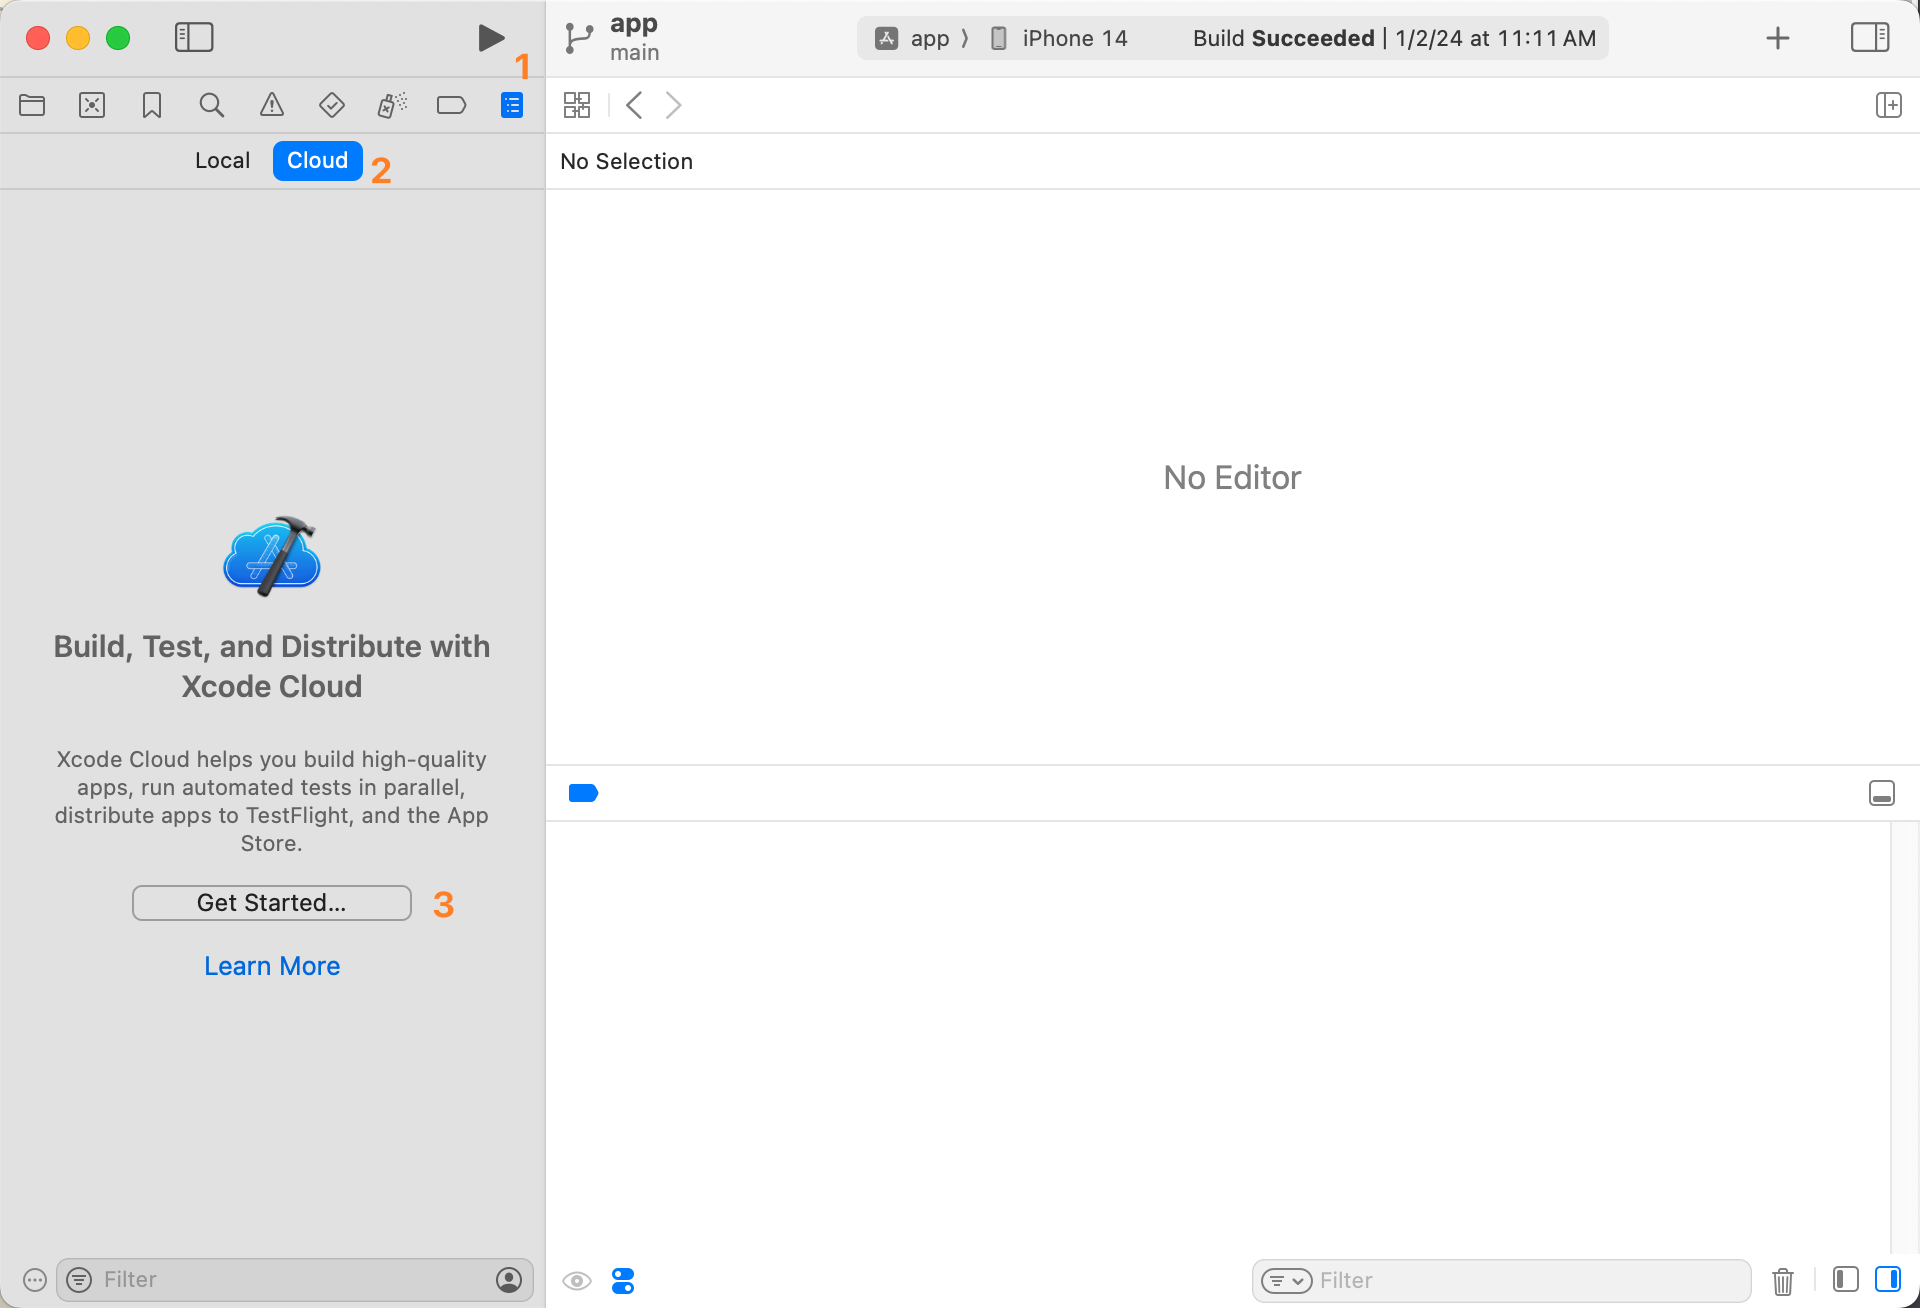
Increase version
We will use a js script to automatically increase version. Since Xcode Cloud will run ci_scripts/ci_post_clone.sh script before building, we should place our custom script there.
You can find more about Xcode Cloud custom build scripts here -> Writing custom build scripts | Apple
#!/bin/sh

# Note: Xcode will run ci_post_clone.sh at ci_scripts directory

export HOMEBREW_NO_INSTALL_CLEANUP=TRUE

# Install node start
brew install node
brew link node
# Install node end

# Change App info
node changeAppInfo.mjs#!/usr/bin/env node
import fs from "node:fs/promises";
import path from "node:path";
import process from "node:process";
async function main() {
try {
// TODO: Replace config path. Note: Xcode will run ci_post_clone.sh at ci_scripts directory
const configPath = path.resolve('../app.xcodeproj/project.pbxproj')
await increaseVersion(configPath)
}
catch (error) {
console.error(error)
process.exit(1)
}
}
/**
* Increase version automatically in project.pbxproj file
* Build #26 1.2 -> 1.2.26
* Build #27 1.2 -> 1.2.27
*/
async function increaseVersion(configPath) {
const configText = await fs.readFile(configPath, { encoding: 'utf-8' })
print(`Changing ${configPath}`)
const regex = /MARKETING_VERSION = (.+?);/g
const versionMatch = configText.match(regex)
if (versionMatch === null) {
throw new Error(`Cant get iOS bundle version in ${configPath}, terminate build`)
}
const bundleVersion = versionMatch[0].replace('MARKETING_VERSION = ', '').replace(';', '')
const finalBundleVersion = `${bundleVersion}.${process.env.CI_BUILD_NUMBER}`
print(`Overwrite version: ${bundleVersion} -> ${finalBundleVersion}`)
const updatedConfigText = configText
.replace(regex, `MARKETING_VERSION = ${finalBundleVersion};`)
await fs.writeFile(configPath, updatedConfigText, { encoding: 'utf-8' })
}
function print(message) {
console.log(`[changeAppInfo] ${message}`)
}
main()App Icon
You App Icon can not have alpha channel, otherwise Xcode Cloud will failed to build.
(Optional) Other notes
- Use
build_iosbranch to trigger build instead ofmainbranch.bashgit checkout build_ios && git rebase main && git push && git checkout main